
If you’ve wondered how to make your own cacao powder, you’re in the right place! This post will detail sourcing, roasting, and grinding cacao beans. Enjoy the journey!
Origins of my cacao curiosity
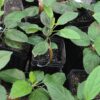
If you’re like me and grew up in the continental US, cacao powder and chocolate chips were probably grocery items that were needed for delicious recipes, but you never considered growing or sourcing your own beans. When I first moved to Florida, I had no intention of turning my porch into a haven for what Mr. Grump calls “diva” plants. To me, gardening was about basics… regular beans, corn, tomatoes, etc. However, as I started researching what grew well here, I was thrilled to learn that dragonfruit tolerated this climate. After begging a lady to sell me a cutting, I started scouring websites to learn more about semi-tropical and tropical plants that I never before would have had the option of growing.
This led me to stumble upon cacao beans. I ordered four from Tradewinds fruit and paid for rush shipping in hopes they would not die before I received them. To my surprise, they all sprouted, and even seemed happy. That winter, when overnight temperatures dropped below 60, Mr. Grump was excited to help me drag them inside each evening and take them back outside in the mornings before work. Despite him saying they were a lot of work, they were more resilient than I expected. About a year in to their short cacao lives, Grump Dog ate off their leaves one day during a porch plant sampling. Within a couple of weeks, all had leaves again. I was in love.
My first large cacao tree
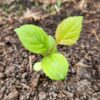
Later that year, I traveled to a small nursery and found a neglected, drooping cacao in a back corner. The worker told me that they did not have any more cacao in stock. He offered me a small discount if I would take it home. I held the trunk straight and realized the tree was taller than me. Of course I could take it home. I know from experience that is possible to stuff anything in a Mini Cooper if you try hard enough. I won’t say how exactly, but the tree made it home, no worse for the wear. It already looked terrible, so what was there to lose?
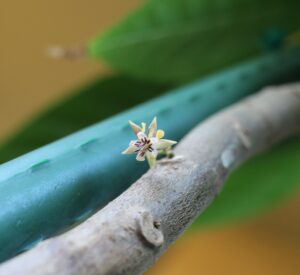
After transplanting the poor cacao tree into an appropriately sized pot full of organic potting mix and compost, watering it well, and providing it a stake so it was not hunched over, it started growing new leaves within days. Within a few months, it rewarded me by producing tiny flowers. I have read that most cacaos are not self-fertile and require pollen from another plant to produce pods. I contacted the website on the tag that was on the tree and was told that the tree was self-fertile. I’m not sure I believe this. However, I have dutifully attempted to hand-pollinate each flower with a small paint brush, just in case the lady from the website is correct.
Learning about chocolate production
Having a blooming cacao tree increased my interest in the chocolate production process. I agree that this was probably premature, given my large tree has yet to produce a pod, and my smaller trees have yet to flower. However, I found a lady on the internet who traded me a plant for some cacao seeds. These had partly fermented and did not seem interested in sprouting, so I Googled how to make things with cacao beans. This led me to order a book called Making Chocolate (by Todd Masonis, Greg Alesandre, Lisa Vega, & Molly Gore). I was not yet ready to make a bar of chocolate, but I figured I could start with cacao powder.
Drying and roasting beans
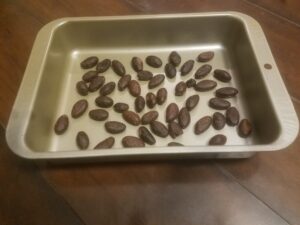
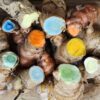
The first step was to dry the cacao beans. I placed them in the sunshine daily (taking them inside at night) for about a week.
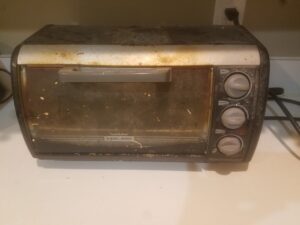
The second step was to roast. As noted in the caption above, an old toaster oven is likely not the optimal way to roast cacao. Following the advice of the book Making Chocolate, I set the temperature for 325 degrees. After several minutes, my thermometer only registered the temperature as 207 degrees. I cranked the temperature up to 400, and still the toaster oven struggled to reach 300 degrees. I had to turn it to the setting for 450 before the optimal temperature was actually reached.
At this point, I placed the beans inside and started the timer for 30 minutes (to avoid potentially burning the beans). Per the recommendation of the chocolate book, I was to wait until I heard popping or until my kitchen smelled wonderfully of brownies. I can’t say either happened. There was a bit of strange whistling and a few crackles that sounded more like Rice Krispies with milk than popcorn popping. By 29 minutes, there was a faint brownie smell and more crackling. I removed the beans from the toaster oven and let them cool.
Tip #1
Don’t use an old toaster oven. Use a reliable heating source; possibly a regular oven with more precise temperature settings.
Grinding beans
About an hour later, I was certain my beans were cool enough to grind. (I had peeled them prior to drying. If you are following along and have whole beans, you may wish to peel them at this point. You can peel by hand, or click here for easier ways to remove the shell.) Prior to this endeavor I had purchased the cheapest coffee bean grinder I could find, so I was sure results would be spectacular. This grinder did not struggle with chopping the beans into fine pieces. However, even with the lid on tightly, these pieces somehow found a way to drift out of the grinder and speckle my counter. I was not surprised, as the reviews on the Target website held similar complaints. They were not wrong.
Tip #2
Find a coffee grinder with a well-sealing lid. Purchasing the cheapest on you can find is probably not the way to do this. Next time I plan to try my Vitamix on a slow setting.
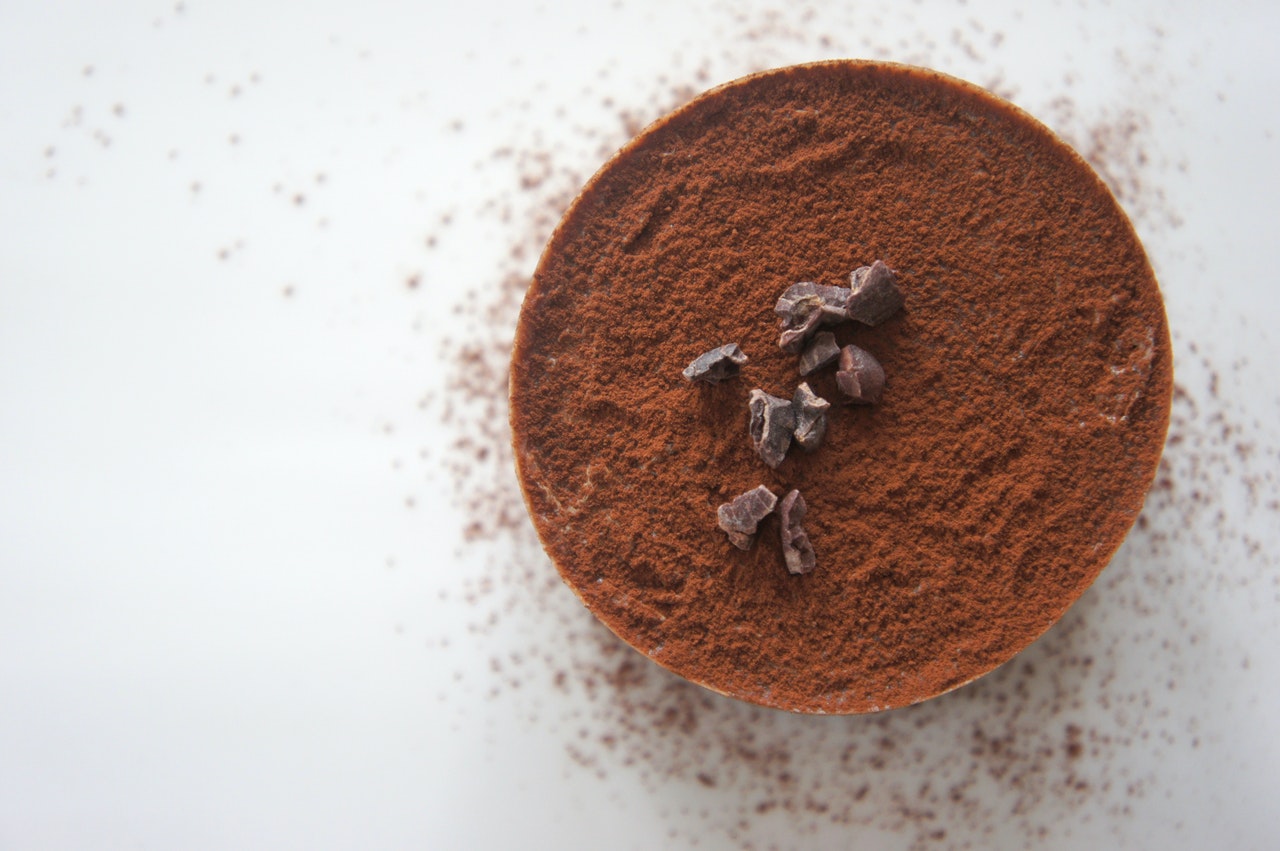
The finished product
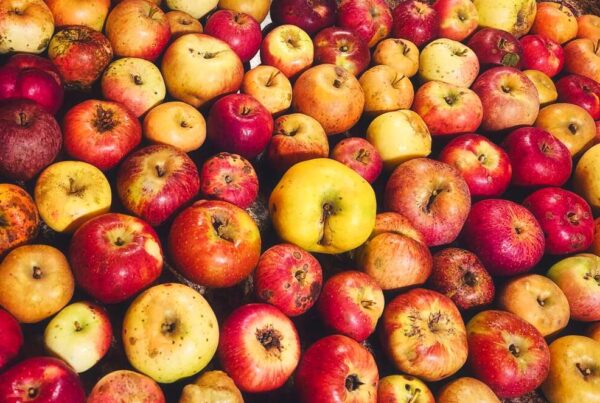
As you can see in the picture below, my freshly ground cacao was darker and less finely ground than the commercial coco powder in my pantry. The flavor was deeper and more complex, with a slightly gritty texture. Based on the chocolate book, I would probably roast the beans a bit longer next time. You can be certain I will try my regular oven rather than the old toaster oven.

What are your favorite uses for cacao powder? Feel free to make suggestions in the comments below. Click here for a chocolate waffle recipe which works well for trying out your freshly ground cacao powder!


Great tips! Seems like a straight forward process- once you work out all those kinks!
Thank you! I’m excited to move forward with taking some additional steps (i.e., to make chocolate bars rather than just cacao powder) here soon now that I’ve purchased a melanger and molds. I’ll be sure to post about the experience, whether successful or not!